Tutorial
Step-by-Step Guide for First Time Setup
Create Domain

Enter a name of your choice for the Domain. Select a domain for your link, and select a location for your Domain.
Create Agent
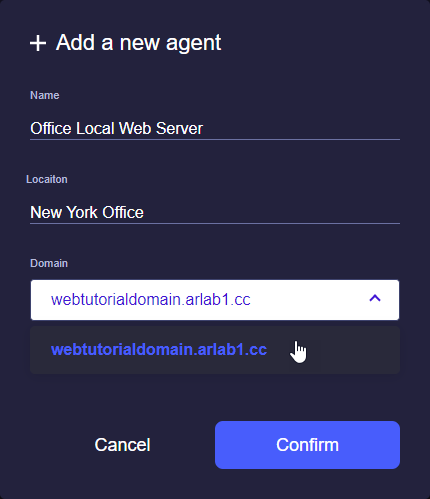
Enter a name and location of your choice for the Agent, and select the domain to set up your Agent.
Install Agent (GL.iNet’s routers)

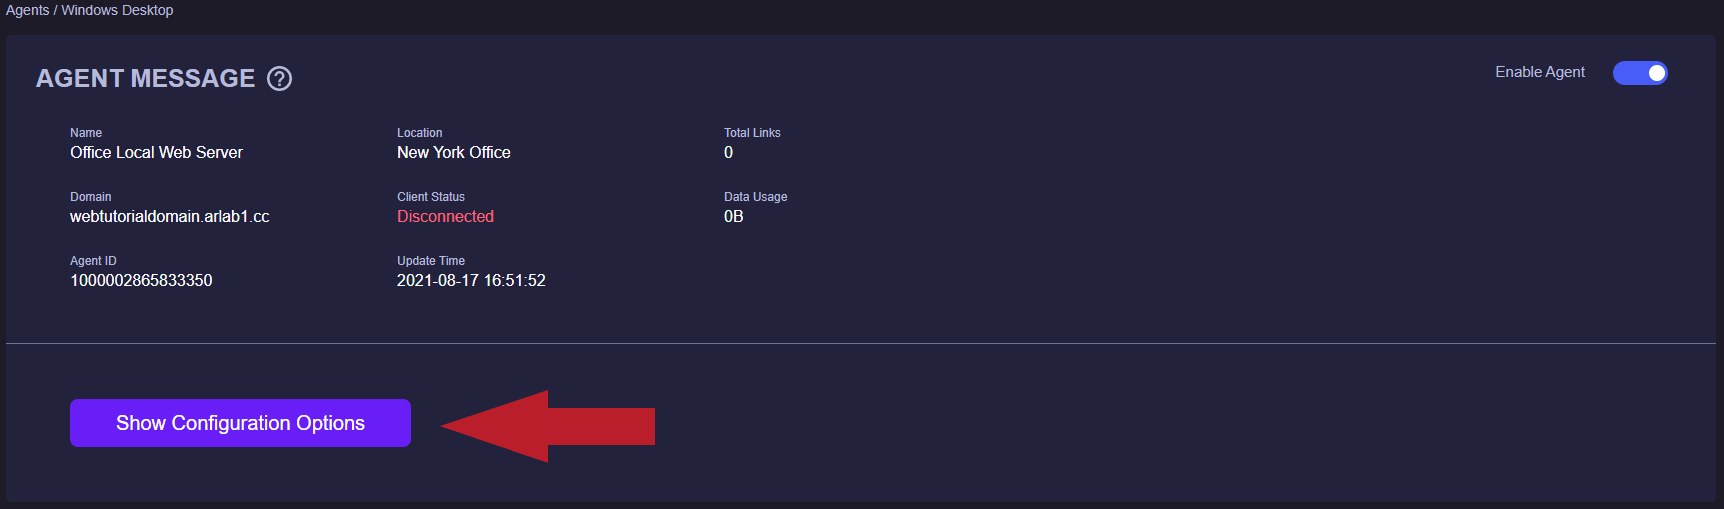
Click on “Show Configuration Options”.

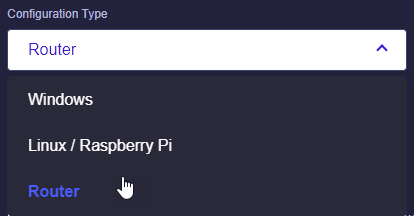
Click on “Router”.
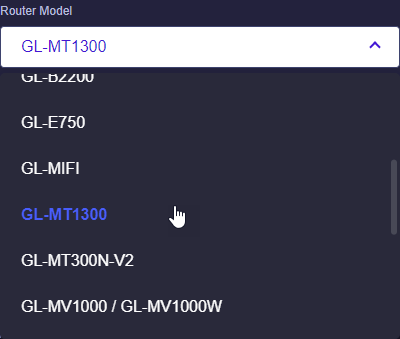
Select your GL.iNet router.
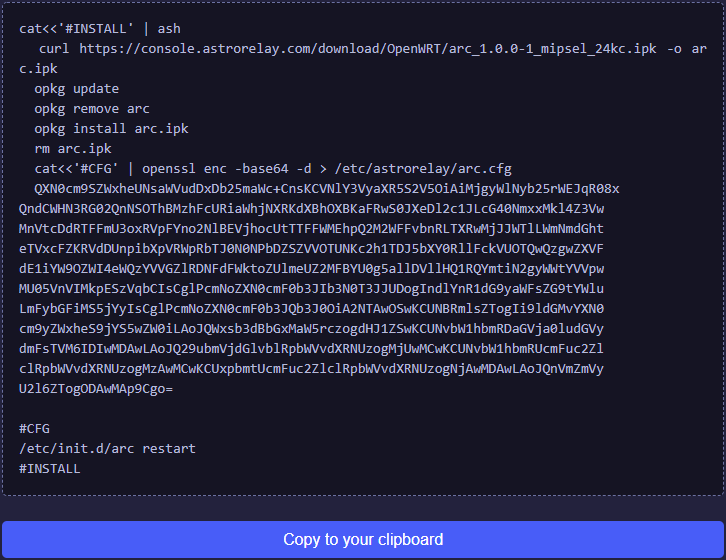
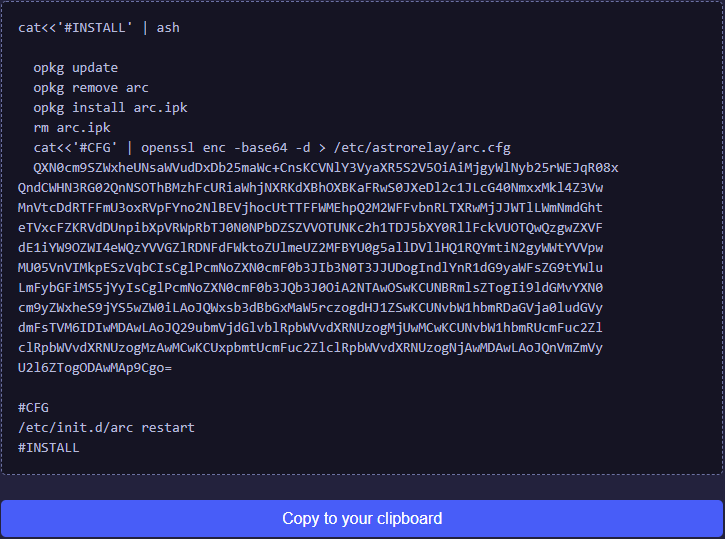
Copy the Agent code by clicking “Copy to your clipboard”.

Access your router via an SSH terminal, Enter “192.168.8.1” under Host Name, enter “22” for Port, and click “Open”.
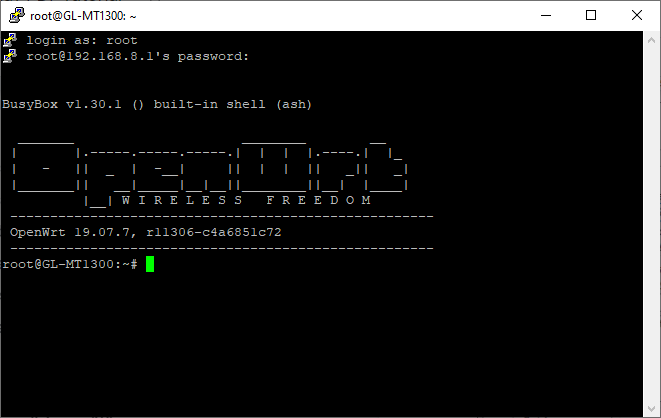
Login as "root", enter your router's password and press enter.

Right click to paste the Agent, and press Enter to install the Agent in your router.
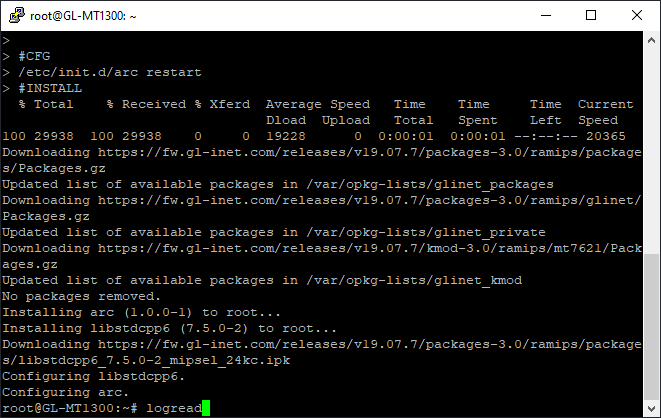
After installing the Agent, enter “logread”, and your session should output “AstroRelay Client”.

If your Agent is active, your client status should be showing “Connected”.
Install Agent (Non-GL.iNet routers)
Click on “Show Configuration Options”.
Click on “Router”.

In the Router Model section, scroll to the bottom and select “Others”.
Copy the Agent code by clicking “Copy to your clipboard”.

Click on “ARC client & configuration” to download and unzip the files.
Download and install WinSCP from https://winscp.net/eng/download.php

Click on “New Session”
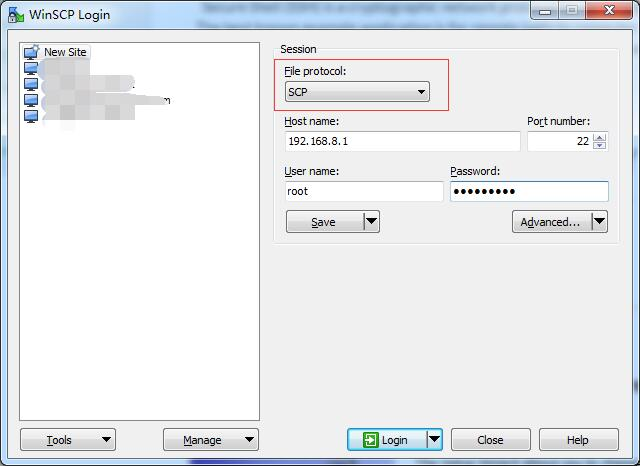
Select SCP for file protocol, enter the host name, port, username, password for your router, and click “Login”.
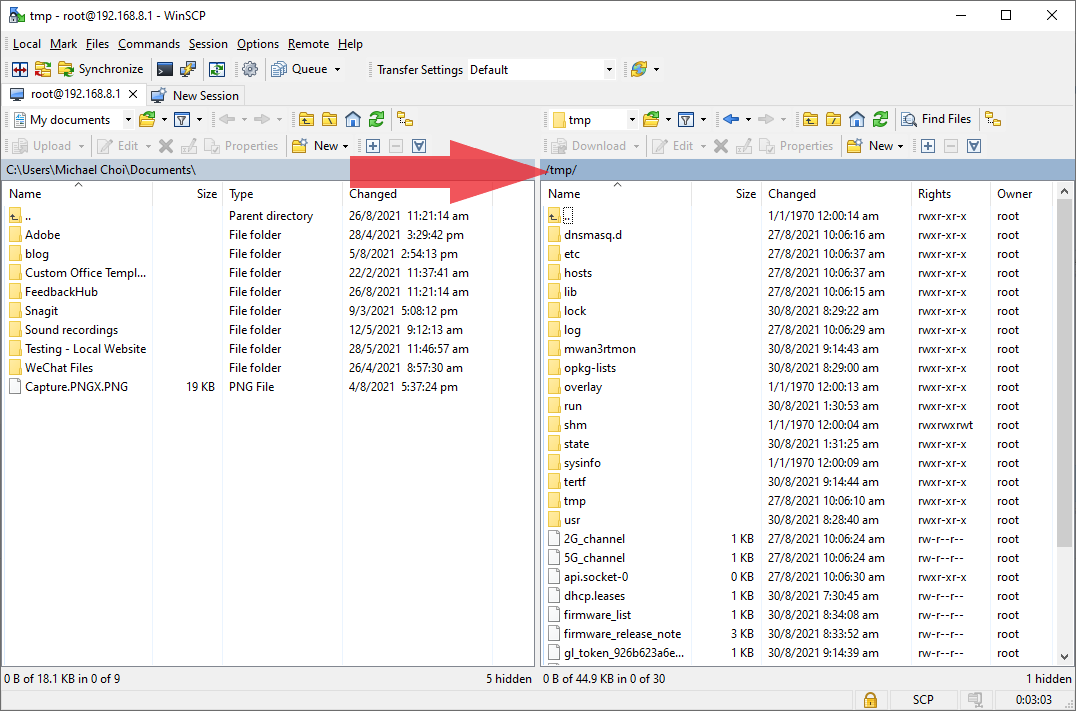
Place all unzipped files of “ARC client & configuration” under /temp/. And restart your router if needed.
Install Agent (Windows)
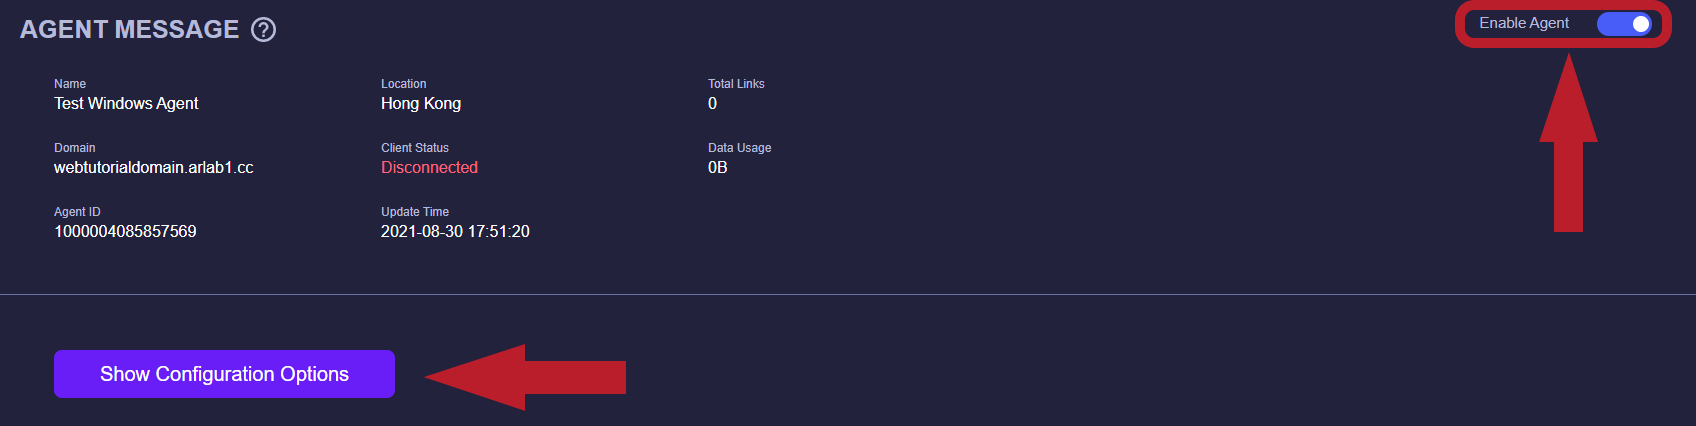
Click on “Show Configuration Options”. Make sure your agent is enabled.
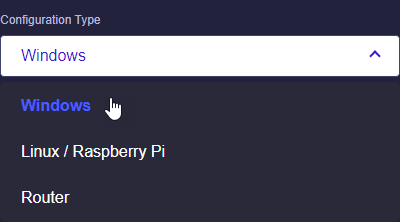
Click on “Windows”.
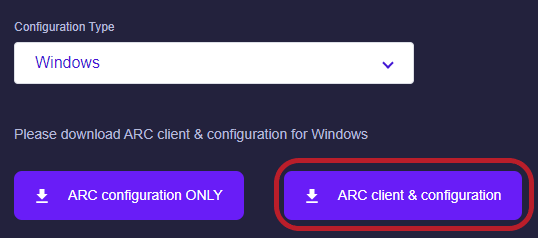
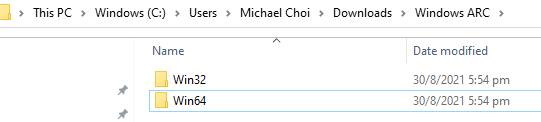
Download “ARC client & configuration”
Run “arc.exe”
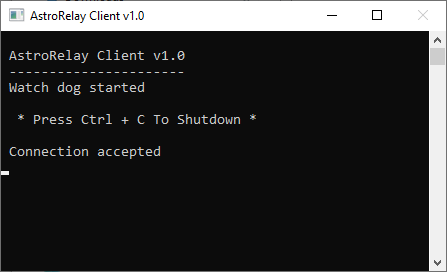
Once the connection is accepted, the agent is successfully installed on your computer.
Remote SSH

In your Agent page, click on “Add Link”.

Enter a name for your link, the Host IP address of your device, select SSH as the service, then click confirm to create the link.

Once the link is created, the URI and the port are listed under the “SERVER & PORT” column
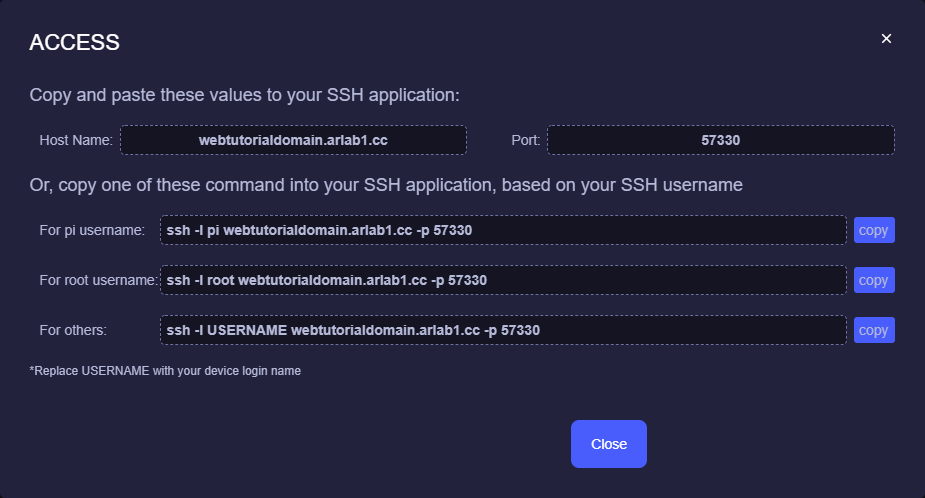
For SSH remote access, click on “SSH” to copy the commands depending on your ssh client.
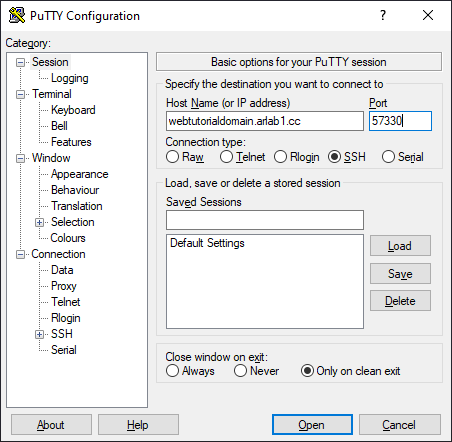
Using the SSH client PuTTY, paste or enter the “Host Name” and “Port”.
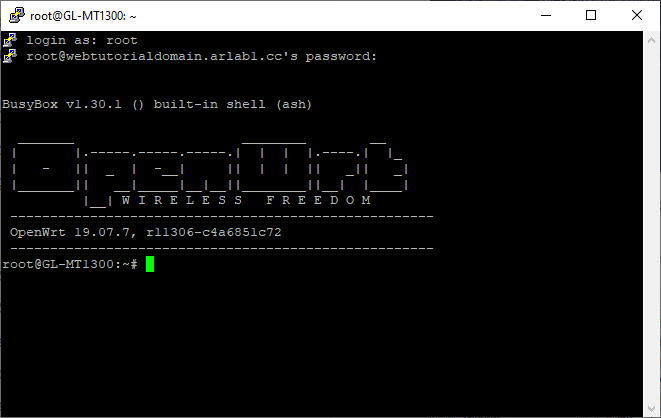
Enter root as login, and enter the password of your router’s admin panel, and you’ll have access to your router.
HTTP to HTTPS
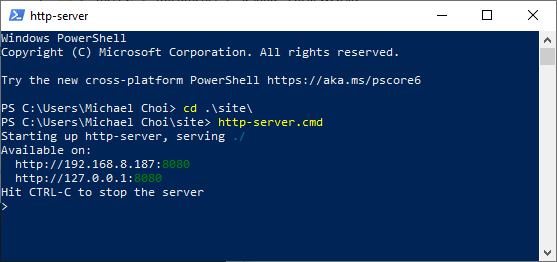
First, confirm the local web server is running properly.

nter a name for your link, the Host IP address of your device, select HTTP to HTTPS as the service, enter the destination port (8080 in this case), then click confirm to create the link.

Once the link is created, you can click directly on “Hyperlink” under the “ACCESS” column to remote access your local web server.
Remote Desktop
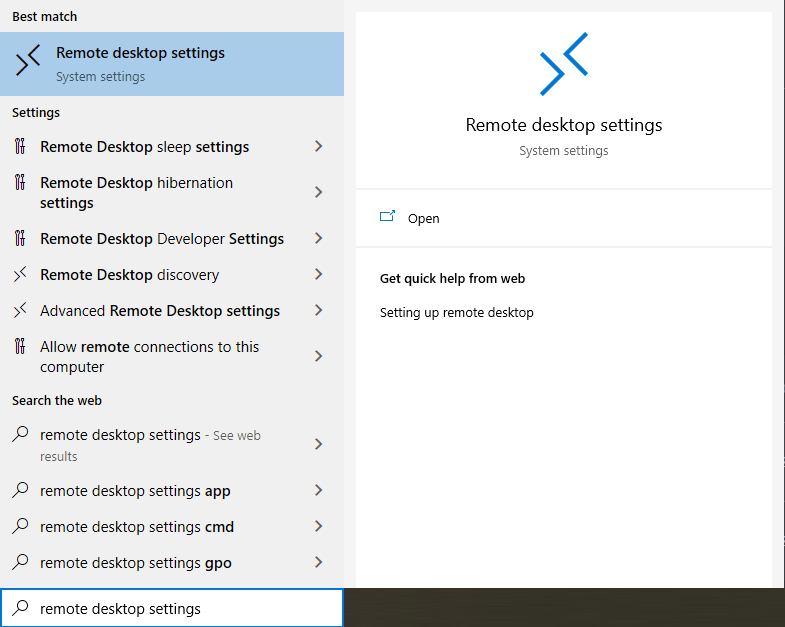
On the PC that you wish to remote access, go to “Remote desktop settings”.
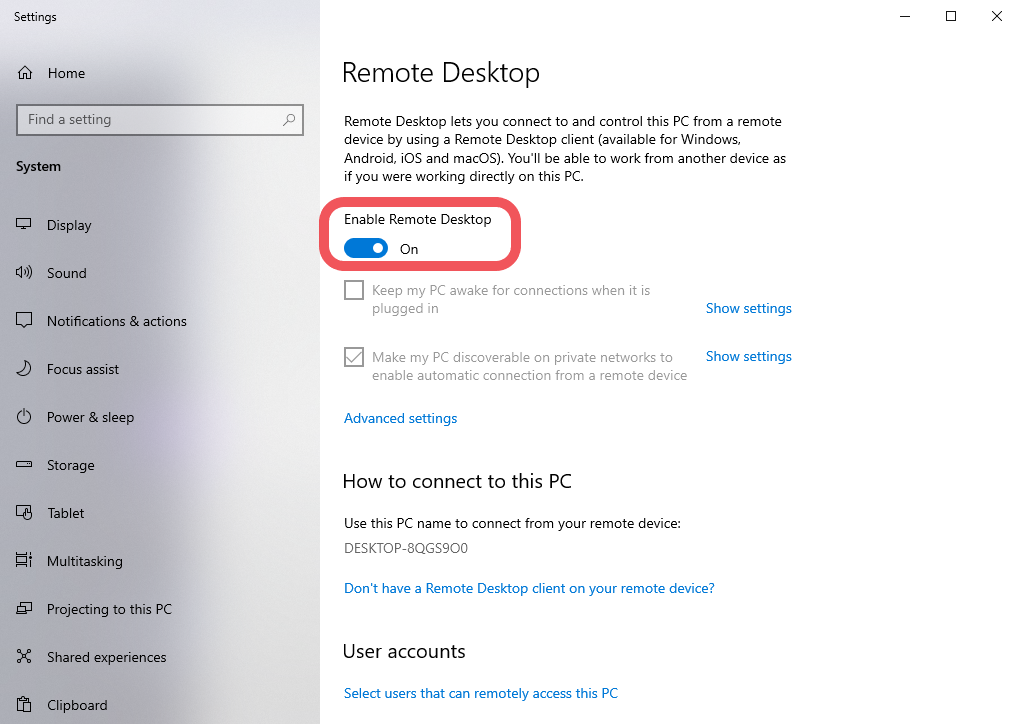
Click on “Enable Remote Desktop”.
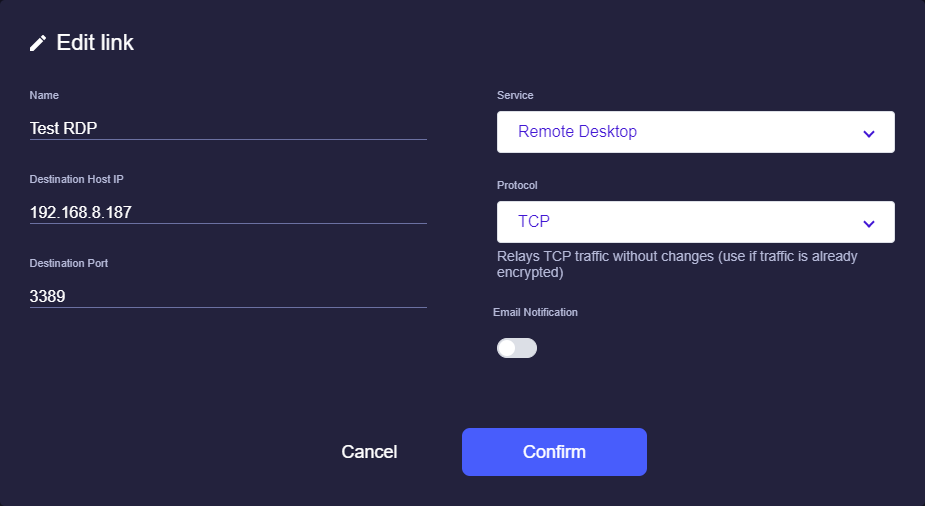
Enter a name for your link, the Host IP address of your computer, select Remote Desktop as the service, then click confirm to create the link.

Once the link is created, you can click directly on “Link” under the “ACCESS” column.

Copy the “Host Name” and the “Port”.

On your other computer, go to “Remote Desktop Connection”.
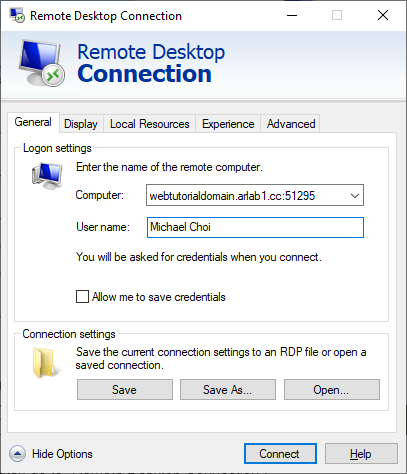
Enter the link and username for your remote computer and click “Connect”.

Enter the password, and you’ll have access to your remote computer.
Add Restrictions (Optional)
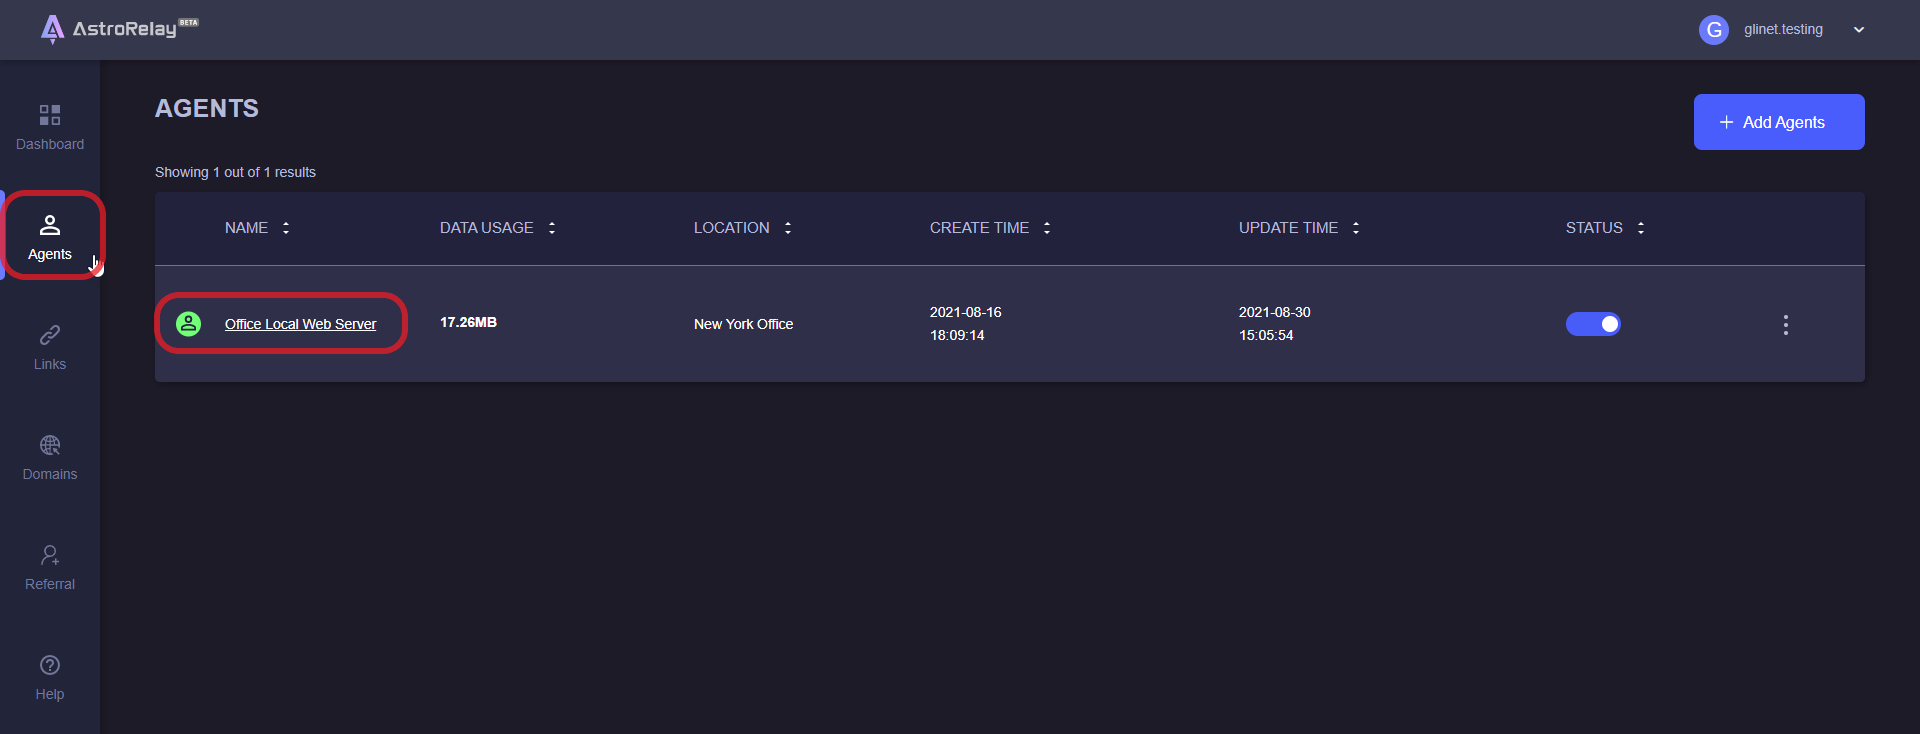
After logging in to AstroRelay, select any of your agents, or go directly to the “Link” tab

On any of your links, go to the extended options and select “Access”
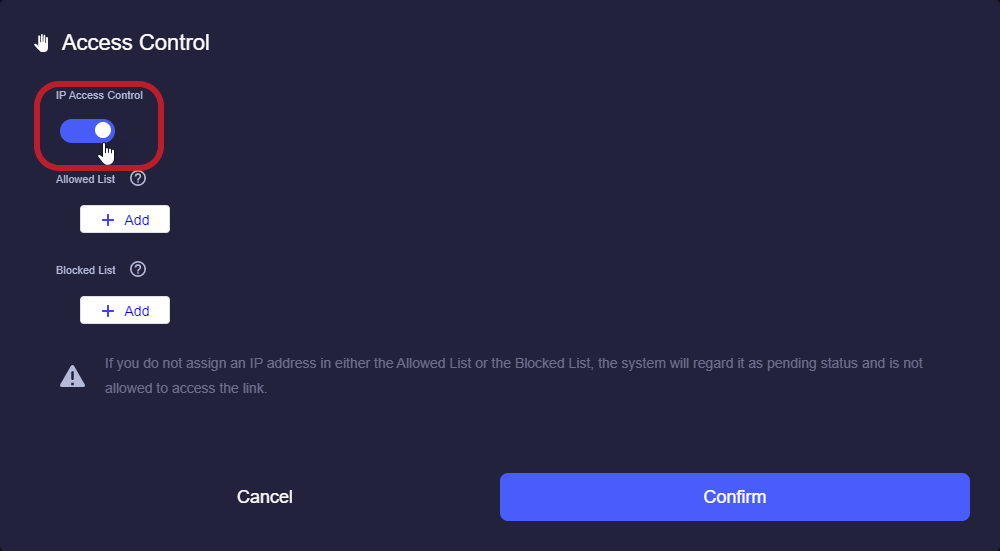
Click on “IP Access Control” to enable the feature.
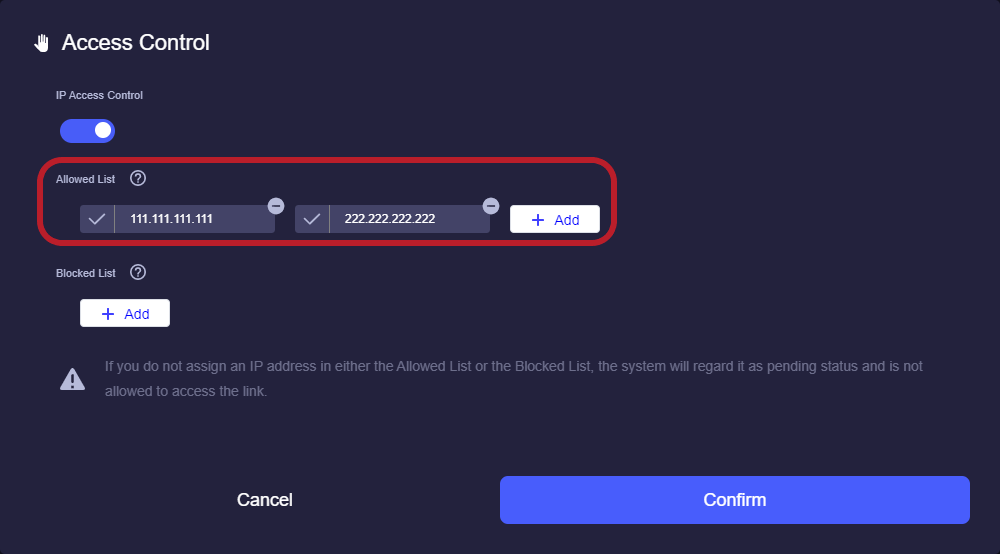
Enter the IP addresses that are allowed to access your link in the “Allowed List” or enter the IP addresses that are not allowed to access your link in the “Blocked List”. Click “Confirm” to update your access control settings.
Keep in mind that:
● Filling in the “Allowed List” represents that all other IP addresses are blocked except for the IPs in the “Allowed List”.
● Filling in the “Blocked List” represents that all other IP addresses have access to the link except for the IPs in the “Blocked List”.
● You can only fill in either “Allowed List” or “Blocked List”, but not both lists at the same time.